Step-by-Step: Building a DIY Wicking Bed for SEQ Homes
Introduction
In the sun-drenched landscapes of South East Queensland (SEQ), where the climate oscillates between torrential rains and arid spells, water-efficient gardening is not just a choice—it's a necessity. Enter the wicking bed: an innovative, self-watering system that harmonizes with SEQ's unique environmental rhythms, offering gardeners a sustainable solution to cultivate verdant, productive gardens with minimal water usage.
Understanding Wicking Beds
A wicking bed is a horticultural marvel that employs capillary action to draw water upwards from an underground reservoir directly to plant roots. This sub-irrigation method ensures consistent moisture levels, fostering robust plant growth and reducing water wastage. In SEQ's subtropical climate, wicking beds mitigate the challenges posed by erratic rainfall patterns, providing a reliable moisture source during dry periods and preventing waterlogging during heavy rains.
Planning Your Wicking Bed
Embarking on the construction of a wicking bed necessitates meticulous planning:
-
Selecting the Appropriate Location: Choose a site that basks in ample sunlight—ideally, six to eight hours daily. Ensure the ground is level to facilitate uniform water distribution.
-
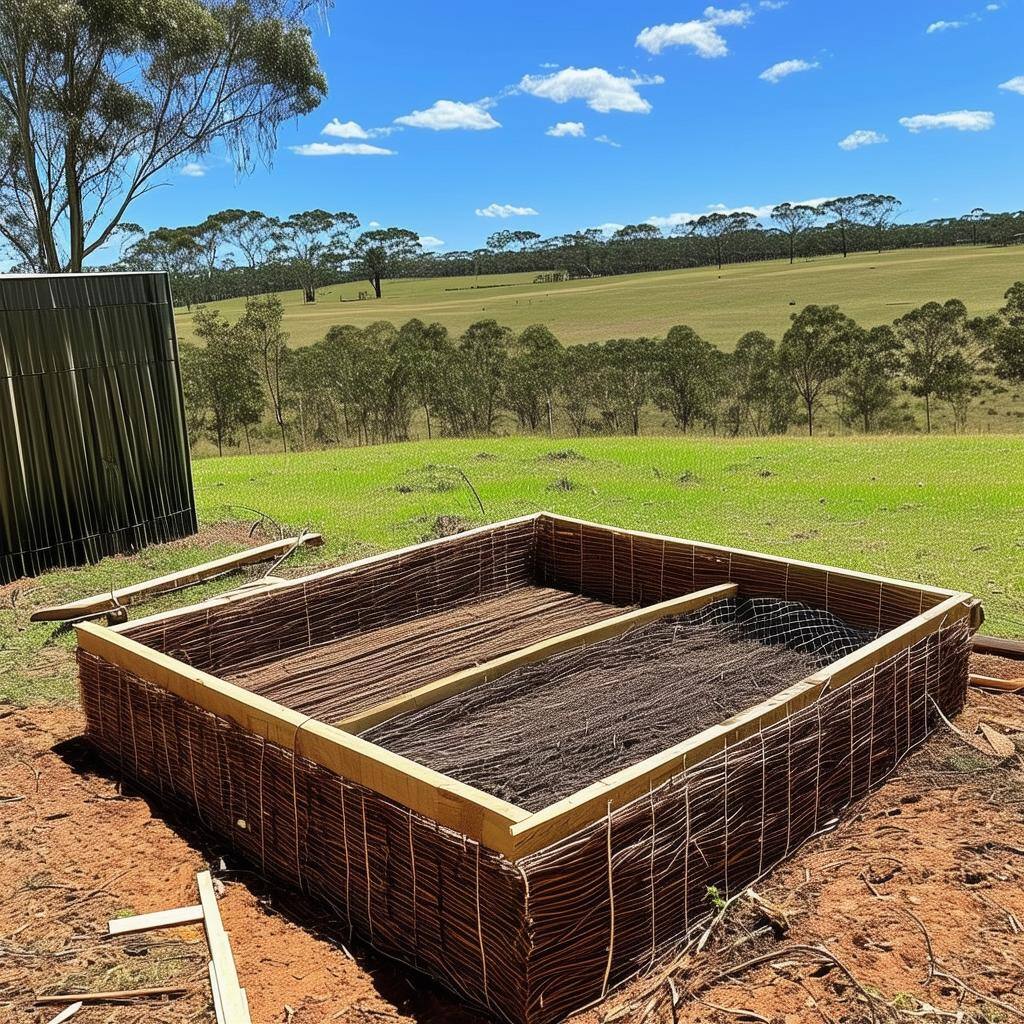
Determining the Size and Materials Needed: Assess the available space and decide on dimensions that suit your gardening aspirations. Common materials include untreated timber, corrugated iron, or repurposed containers like bathtubs or IBCs (Intermediate Bulk Containers).
Materials and Tools Required
Gather the following materials to commence your wicking bed project:
-
Materials:
- Waterproof liner (e.g., pond liner or heavy-duty plastic)
- Aggregates (coarse gravel or scoria)
- Geotextile fabric
- PVC pipes (for inlet and overflow)
- High-quality soil mix
- Mulch
-
Tools:
- Measuring tape
- Saw
- Drill
- Shovel
- Level
- Staple gun
Construction Steps
-
Preparing the Base and Lining: Construct the bed frame using your chosen materials. Line the interior with the waterproof liner, ensuring it covers the bottom and sides without punctures.
-
Installing the Water Reservoir: Fill the bottom 150-200mm with coarse gravel or scoria to form the reservoir. Position a perforated PVC pipe horizontally within this layer to facilitate water distribution. Extend a vertical pipe from this system to the bed's surface to serve as the water inlet.
-
Adding the Wicking Medium: Place a layer of geotextile fabric over the gravel to separate the reservoir from the soil, preventing soil from clogging the water reservoir.
-
Filling with Soil and Planting: Add a well-draining soil mix atop the fabric, filling the bed to the desired height. Plant your chosen flora, considering species that thrive in SEQ's climate. Apply a 5-7cm layer of mulch to conserve moisture and regulate soil temperature.
Maintenance and Care
To ensure the longevity and efficacy of your wicking bed:
-
Monitoring Water Levels: Regularly check the water reservoir via the inlet pipe and replenish as necessary, especially during dry spells.
-
Seasonal Considerations for SEQ: During the wet season, ensure the overflow outlet functions correctly to prevent waterlogging. In the dry season, maintain consistent watering to support plant health.
Conclusion
Constructing a DIY wicking bed offers SEQ homeowners a harmonious blend of innovation and sustainability. By embracing this method, you cultivate a resilient garden that flourishes amidst climatic variances, all while championing water conservation—a triumph for both gardener and environment.


