Creating a Worm Farm in SE Qld: Step-by-Step Instructions
1. Introduction
Embarking on the journey of worm farming in Southeast Queensland (SE Qld) offers a sustainable method to recycle organic waste and enrich your garden soil. This guide provides detailed steps to establish a thriving worm farm tailored to the SE Qld climate.
2. Understanding Worm Farming
Worm farming, or vermiculture, involves cultivating specific worm species to decompose organic matter, resulting in nutrient-rich vermicompost. This process not only reduces household waste but also produces valuable fertilizer for gardens.
3. Selecting the Appropriate Worm Species
For SE Qld's subtropical climate, the following worm species are well-suited:
-
Red Wigglers (Eisenia fetida): Known for their efficiency in processing organic waste.
-
Tiger Worms (Eisenia andrei): Adaptable and prolific composters.
-
Blue Worms (Perionyx excavatus): Prefer warmer temperatures, making them ideal for SE Qld.
4. Materials Needed
-
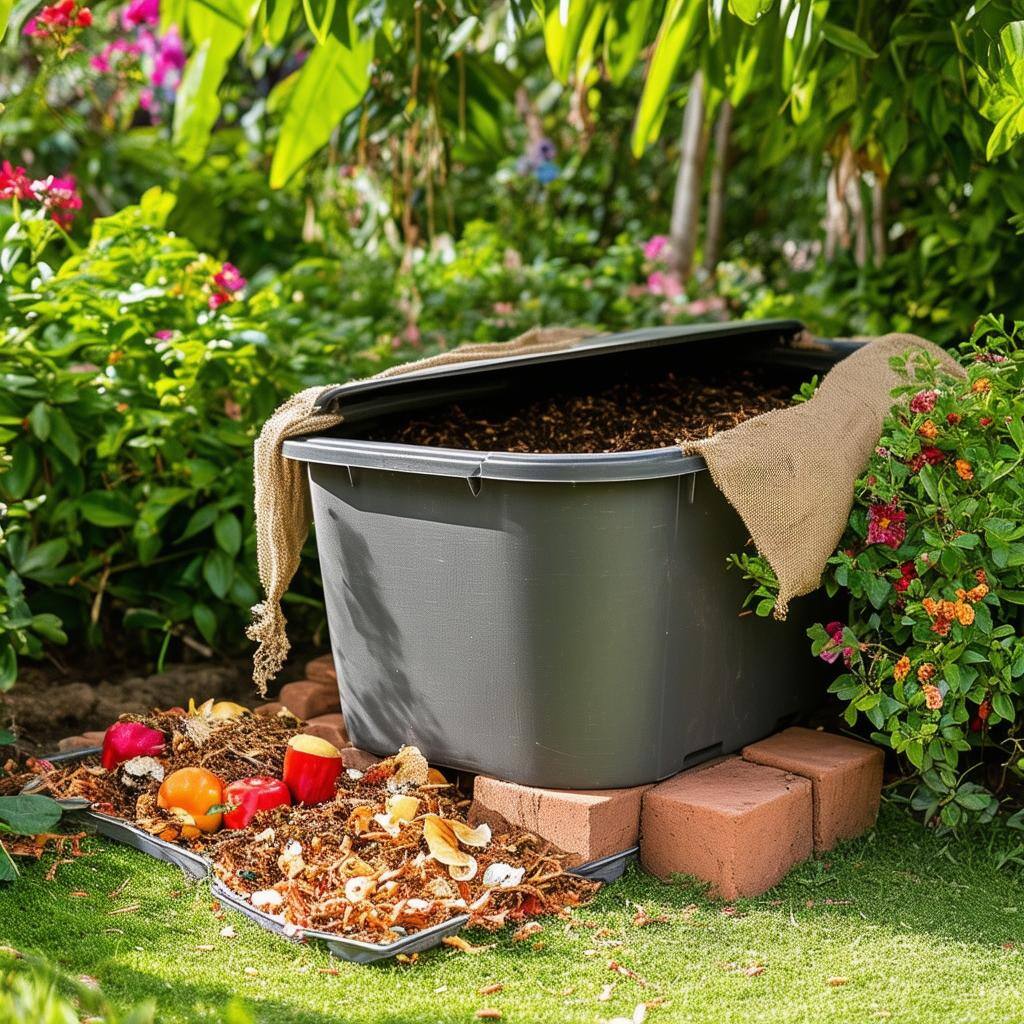
Container: A well-ventilated, opaque bin with a lid. Options include polystyrene boxes, plastic bins, or purpose-built worm farms.
-
Bedding Material: Moistened coir peat, shredded newspaper, or aged compost to create a comfortable habitat for the worms.
-
Worms: A starter population of approximately 1,000 composting worms.
-
Covering: Hessian sack, damp newspaper, or cardboard to maintain darkness and moisture.
5. Setting Up the Worm Farm
-
Prepare the Container:
-
Ensure proper drainage by creating small holes at the base of the container.
-
Elevate the container on bricks or a stand, placing a tray underneath to collect excess liquid, commonly known as "worm tea."
-
-
Add Bedding:
-
Fill the container to about one-third with moist bedding material.
-
The bedding should have the consistency of a wrung-out sponge to provide an optimal environment.
-
-
Introduce the Worms:
-
Gently place the worms on top of the bedding.
-
Allow them to burrow naturally, which may take a few minutes.
-
-
Cover the Bedding:
- Place a moist hessian sack, newspaper, or cardboard over the bedding to retain moisture and darkness.
-
Position the Worm Farm:
- Locate the worm farm in a shaded, cool spot, away from direct sunlight and heavy rain.
6. Feeding the Worms
-
Suitable Food Scraps:
-
Fruit and vegetable peelings (avoid citrus and onion).
-
Coffee grounds and tea bags.
-
Crushed eggshells.
-
Shredded paper and cardboard.
-
-
Foods to Avoid:
- Meat, dairy products, and oily foods, as they can attract pests and create odors.
-
Feeding Guidelines:
-
Start by adding small amounts of food scraps.
-
Bury the scraps in the bedding to prevent pests.
-
Observe the consumption rate and adjust feeding accordingly, ensuring not to overfeed.
-
7. Maintenance
-
Moisture Control:
-
Maintain bedding moisture at the level of a damp sponge.
-
Add water if too dry, or incorporate dry bedding materials if overly wet.
-
-
Temperature Regulation:
-
Keep the worm farm in a location where temperatures range between 15°C and 25°C.
-
In hot weather, add frozen water bottles to cool the environment.
-
-
Harvesting Vermicompost:
-
After a few months, the bedding will transform into dark, crumbly compost.
-
To harvest, move the contents to one side and add fresh bedding and food to the empty side.
-
The worms will migrate to the new food source, allowing you to collect the finished compost.
-
-
Collecting Worm Tea:
-
Drain the liquid from the collection tray regularly.
-
Dilute the worm tea with water at a 1:10 ratio and use it as a liquid fertilizer for plants.
-
8. Troubleshooting Common Issues
-
Unpleasant Odors:
-
Caused by overfeeding or poor aeration.
-
Solution: Reduce feeding amounts and gently turn the bedding to introduce oxygen.
-
-
Pest Infestation:
-
Attracted by exposed food or inappropriate items.
-
Solution: Bury food scraps and avoid adding meat or dairy products.
-
-
Worms Escaping:
-
Indicates unfavorable conditions such as extreme temperatures or excessive moisture.
-
Solution: Assess and adjust the environment to maintain optimal conditions.
-
9. Benefits of Worm Farming
Establishing a worm farm in Southeast Queensland (SE Qld) offers numerous advantages that extend beyond waste reduction and soil enhancement.
-
Environmental Impact:
-
Waste Reduction: By diverting organic waste from landfills, worm farming significantly decreases methane emissions, a potent greenhouse gas contributing to climate change.
-
Resource Conservation: Producing vermicompost at home reduces reliance on commercial fertilizers, thereby lowering the environmental footprint associated with their production and transportation.
-
-
Soil Improvement:
-
Nutrient Enrichment: Vermicompost, the end product of worm farming, is rich in essential nutrients like nitrogen, phosphorus, and potassium, which are readily available for plant uptake, promoting vigorous growth.
-
Soil Structure: The addition of vermicompost improves soil aeration and water retention, creating an optimal environment for root development and microbial activity.
-
-
Economic Benefits:
- Cost Savings: By generating your own high-quality fertilizer, you can reduce or eliminate the need to purchase commercial soil amendments, leading to significant cost savings over time.
-
Educational Value:
-
Learning Opportunity: Engaging in worm farming provides a hands-on educational experience, teaching valuable lessons about ecology, biology, and sustainable practices.
-
Community Engagement: Sharing knowledge and surplus vermicompost with neighbors and local gardening groups fosters community connections and promotes environmental stewardship.
-
By embracing worm farming, residents of SE Qld can contribute to a more sustainable environment, enhance their gardens, and enjoy the myriad benefits that this eco-friendly practice offers.


